Phalaenopsis orchids are among the most popular and stunning orchids, known for their ability to bloom year-round with proper care. Many orchid lovers, especially beginners, often struggle with maintaining their orchids in good health. A common issue is finding the right balance of nutrients and moisture to ensure consistent growth and flowering. Today, I will introduce an innovative method of growing Phalaenopsis orchids using coconut shells as environmentally friendly pots. Additionally, I will share a natural organic fertilizer made from rose petals to help your orchids thrive with vibrant blooms.
The Benefits of Using Coconut Shells as Orchid Pots
Coconut shells are an excellent alternative to traditional plastic pots. They are biodegradable, environmentally friendly, and offer numerous benefits for orchid growth:
- Good Air Circulation: The natural texture of coconut shells allows for excellent aeration, preventing root rot and promoting healthier roots.
- Enhanced Drainage: Unlike plastic pots, coconut shells have a porous surface that helps regulate moisture levels, reducing the risk of overwatering.
- Sustainability: Reusing coconut shells for orchid pots reduces plastic waste and supports eco-friendly gardening practices.
- Aesthetic Appeal: The rustic, natural look of coconut shell pots enhances the beauty of your orchids, making them a charming addition to any garden or indoor space.
How to Make an Orchid Pot from a Coconut Shell
Step 1: Selecting and Preparing the Coconut Shell Choose old coconuts as they have harder and more durable shells. Using a pen, mark the shell where you plan to cut. Carefully cut the shell into two parts using a saw or a sharp knife. The bottom part will serve as the base of the pot.
Step 2: Creating Ventilation Holes Drill several small holes in the bottom of the coconut shell to improve drainage and prevent waterlogging. These holes allow excess water to escape and ensure the roots receive adequate airflow.
Step 3: Assembling the Pot Attach the two coconut shell pieces together using strong adhesive, such as 502 glue. To strengthen the structure, sprinkle some sawdust into the gaps before gluing. Once assembled, let the pot dry completely before using it.
arrow_forward_ios
Watch MorePause
00:00
00:07
05:06Mute
Powered by
GliaStudios
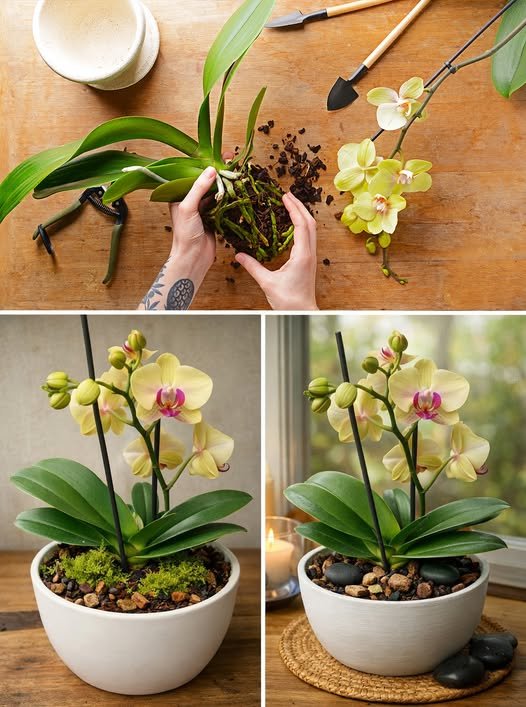
Step 4: Preparing the Orchid for Planting Before placing your orchid in the new coconut shell pot, soak its roots in clean water for about 30 minutes. This helps the plant absorb sufficient moisture before being potted.
Step 5: Planting the Orchid Place the orchid inside the coconut shell pot and surround it with pine shavings and charcoal. These materials help maintain the right level of moisture and provide essential nutrients to support root development. Water the orchid sparingly for the first few days to allow it to acclimate to its new environment.
Making Natural Fertilizer from Rose Petals
Instead of discarding wilted roses, you can turn their petals into a nutrient-rich organic fertilizer for your orchids. Rose petals contain essential nutrients, including vitamin C, carotene, B vitamins, vitamin K, calcium, and potassium, all of which support plant health and encourage blooming.
Step 1: Collecting and Preparing the Ingredients Gather a sufficient number of rose petals and place them in a plastic jar. Add 1 liter of water to the jar. To accelerate the decomposition process, add one packet of instant dry yeast. If you have leftover bread, add a small piece to the mixture, as the sugar and starch in the bread will help probiotics break down organic matter more effectively.
Step 2: Fermenting the Mixture Seal the jar and let it sit for about a week. During this time, the organic matter will decompose, creating a rich liquid fertilizer. You will know the process is successful when a white film forms on top and the mixture develops a slightly sour, bread-like aroma.
Step 3: Using the Fertilizer After one week, dilute the fermented mixture by adding 1.5 liters of water. To fertilize your orchids, mix three tablespoons of this natural fertilizer with additional water and apply it once a week. The nutrients, including potassium and calcium, will stimulate root growth and enhance flower production.
Results After Two Months
With consistent care, your orchids will flourish in their coconut shell pots. The combination of proper hydration, aeration, and natural fertilizers will lead to strong root growth and continuous blooming. Two months after planting, you will notice:
- Longer, healthier roots that securely attach to the coconut shell.
- Greener leaves with improved resistance to pests and diseases.
- Increased flower spikes, leading to year-round blooming.
- Vibrant, long-lasting flowers with enhanced color and fragrance.
Additional Orchid Care Tips
- Watering: Water orchids early in the morning and avoid overwatering. The coconut shell pot helps retain moisture while preventing excess water buildup.
- Light Exposure: Keep orchids in a well-lit area with indirect sunlight to prevent leaf burn.
- Temperature & Humidity: Maintain a warm and humid environment for optimal growth.
- Regular Feeding: Use the rose petal fertilizer once a week and supplement with other organic fertilizers like banana peel or rice water for balanced nutrition.
By adopting this eco-friendly planting method and using natural fertilizers, you can grow healthy, beautiful orchids while contributing to environmental sustainability. Whether you’re a beginner or an experienced orchid enthusiast, this technique will help you achieve stunning blooms all year round!